Alot of bloggers including you and me starts their first blog on blogger.com platform which is a free to use platform by google.
At the begining most of us don't know some of the very basic tricks and tips like getting URL of image is one of those. When i was new to blogger platform then sometime i required URL of an image , luckily i was known to little html and css which i learnt in school.
But many bloggers don't have knowledge of HTML and coding so they struggle to get URL of an image.
So today in this tutorial i am going to show you how to upload images and get its URL in blogger.
In order to do that just ,
Follow these steps :
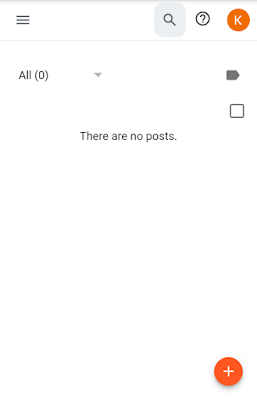
Step 1 : Go to Blogger Dashboard and navigate to posts.
Step 2 : click on orange plus to create new post and you will see post editor .
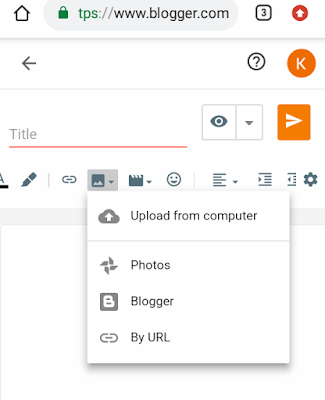
Step 3 : In menu bar find image icon just click on it.
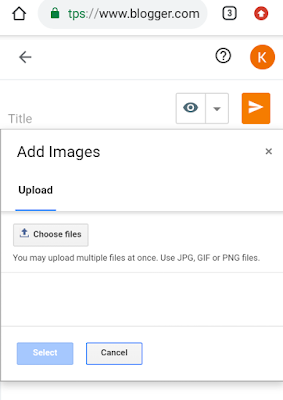
Step 4 : click on upload from computer button and you will see like this.
Step 5 : choose any image and let it upload. After uploading completes , just select that image and your image will be present in the post.
Getting URL of an image
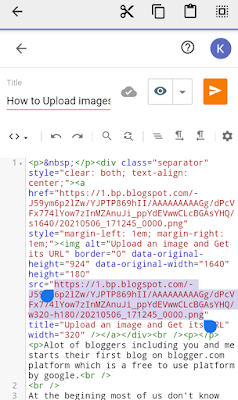
In order to get image URL you have to check its source code. For that click on HTML mode in menu and you will see codings like below.
Now go to region where image lies , inorder to reach to image you can read nearby texts in a post . But if post has single image then it will be easy.
Check for <img src=".............."> tag
Src = " something "
That something is URL of your image . Just select that Text and copy it . Now you can use this URL wherever you want.


Comments
Post a Comment